Blog | Integrate DISQUS into Asp.Net MVC application
Integrate DISQUS into Asp.Net MVC application
Posted on Friday, May 12, 2017
1. What is DISQUS?
DISQUS is the commenting system which is popular in the field of blogging site. It makes much easier for the web publishers to manage comments as they do not require developing, integrating and maintaining comments in their websites.
2. Why to use?
We often need our website to allow user comment to have communication with them. So, instead of designing, developing and maintaining our own comment system, it will be much better to use that already exists which will save our time enormously and allowing us to focus only on our main idea i.e. blogging for instance.
Further, DISQUS is a very popular system used by millions of publishers.
3. Steps on integrating it:
Following are the steps on how to integrate Disqus:
i. Create a Disqus account. Click here to sign up.
Note: A verification email will be send to your email so you need to verify.
ii. After sign up, you will be directed to new page (Account Created) with two anchor elements:
- I want to comment on sites.
- I want to install Disqus on my site.
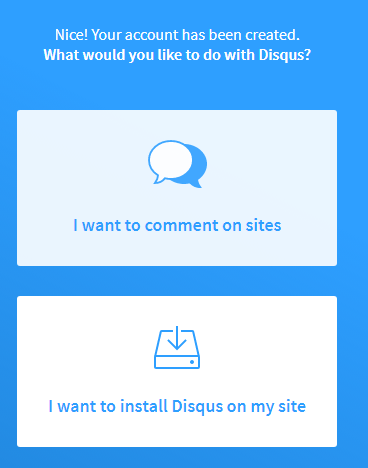
iii. Click on “I want to install Disqus on my site”.
iv. In the new page (Register Site)
- Leave Site Owner and Organization as default.
- For Website Name, provide a name. For an example, for this very site, I provide a ‘topman’ as a Website Name.
- Select a suitable category for what type of website are you implementing disqus commenting system. For an example, I chose ‘Tech’ category.
- Click “Create Site” to continue.
v. Again, in the new page
a. Select a plan:
On Basic section, click “Continue on Basic” (it is free :D). You can choose other depending on your site requirements.
b. Select Platform:
Click “I don’t see my platform listed, install manually with Universal Code” from the bottom of the page.
c. Install Instructions:
Copy the code from the label 1 on your views file that you want the disqus to load.
Now, you need to update only the following configuration variable section. Do not edit other section. Look at an example below:
var disqus_config = function () {
this.page.url = "http://www.topman.com.np/Blog/Details/@Model.WorkId";
this.page.identifier = "Blog/@Model.BlogId";
};
-
- i. For url: I have set it to
“http://www.topman.com.np/Blog/Details/@Model.BlogId”where BlogId value will be dynamically loaded for different blog. - You have to set it with both static and dynamic value because in future you might use SSL (https) or you might change your domain name or change url pattern. If you don't specify it, the default browser url will be taken as its value. But if you assign your value, even if you make change on url structure, you will still be to load the corresponding disqus comment thread by using this static url with appropriate dynamic value at the end.
- ii. For identifier: I have set it to
"Blogs/@Model.BlogId" - I have given “Blogs/” before the id because in my website, there is a blog as well as work section and there could be others section as well in the future. All of those section Id value will start from 1 so to differentiate from other section, for this very page, I have used “Blog/” before Id. For work section, I have used “Work/” before dynamic value of work id.
- i. For url: I have set it to
- d. Now click “Configure” to continue.
- e. Configure Disqus: You can change appearance, website name, website url(e.g. your valid url: www.topman.com.np) and others etc.
- f. Finally, click button “Complete Setup”
- Note: By default, a user must login with either social media sites or disqus member in order to post comment. If you want to allow users to post as a guest, go to Admin, Settings, Community and then check on ‘Allow guests to comment’ and click Save.
-
- Few helpful links are as below:
https://help.disqus.com/customer/portal/articles/472098-javascript-configuration-variables
https://help.disqus.com/customer/en/portal/articles/2158629
http://stackoverflow.com/questions/36605638/why-are-disqus-comments-not-loading-over-https
http://stackoverflow.com/questions/10936984/what-happens-if-someone-else-uses-my-disqus-shortname
- It is obvious that there will be errors and confusion at the start while implementing it, so what I recommend is try it using sample application and play with it for a while before implementing it in your real site.