Blog | How to host Asp.net MVC application in SmarterASP.NET web hosting
How to host Asp.net MVC application in SmarterASP.NET web hosting
Posted on Wednesday, October 25, 2017
Following are the steps to host your Asp.net web application in online web hosting. Here, the application is hosted in SmarterASP.NET.
- In visual studio, right click Project in Solution Explorer and click Publish.
- In profile, click Custom and give a name. E.g. SmarterAsp
- In connection, select File System as a publish method and browse a folder in the target location. The target location is where the required files for deployment will be produced after published.
- In configuration, select Release as a Configuration and leave other File Publish Options as default.
- In preview, click Publish and check the Output Window in Visual studio for the success or error.
- In the target location, necessary files for deployment will be generated except database file.
- Now, make a zip file for this targeted folder.
- Go here https://www.smarterasp.net/secured_signup?plantype=&affiliate=&dealcode= to sign up for a trial account. After signup, verify your email.
- Login here https://member3-2.smarterasp.net/account/loginform?go=1.
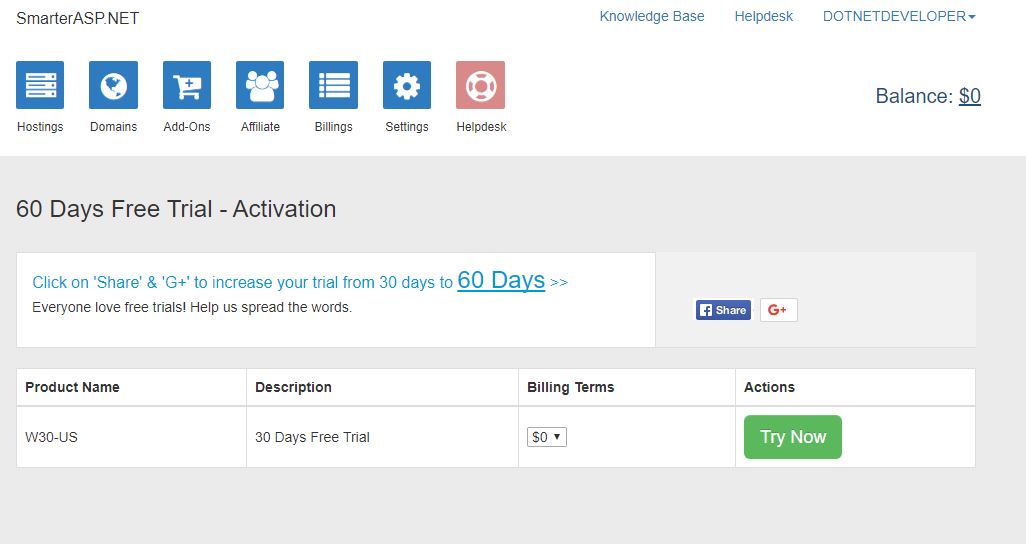
- In the dashboard, click Try Now to start a 30 Days Free Trial. Remember you can extend to 60 days trial if you share SmarterAsp hosting site.
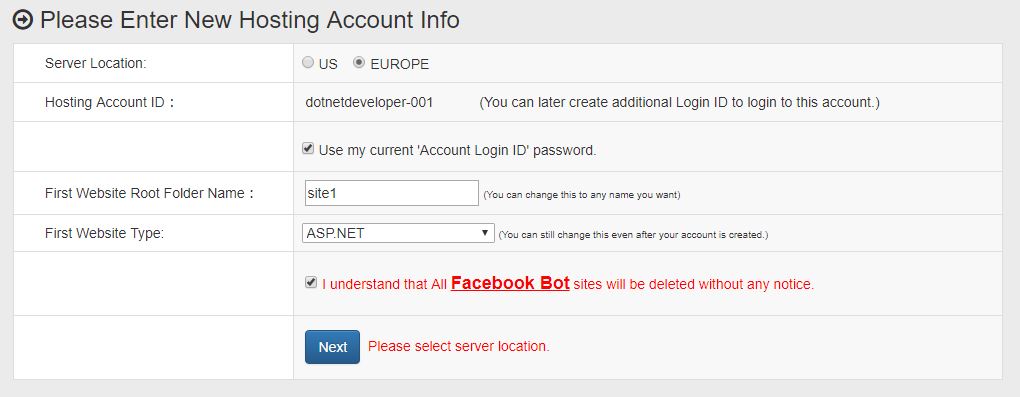
- Now, select the server location that you preferred, select ASP.NET in Website Type, tick Facebook Bot option. You can leave other options as default. Remember here, the Site1 is the folder where you need to upload the files. Click Next.
- In the next section, click Submit and wait. After few seconds, you will be redirected in the dashboard again, click Control Panel.
- In the control panel, you see the following details. Here, dotnetdeveloper-001-site1.htempurl.com is the domain name.
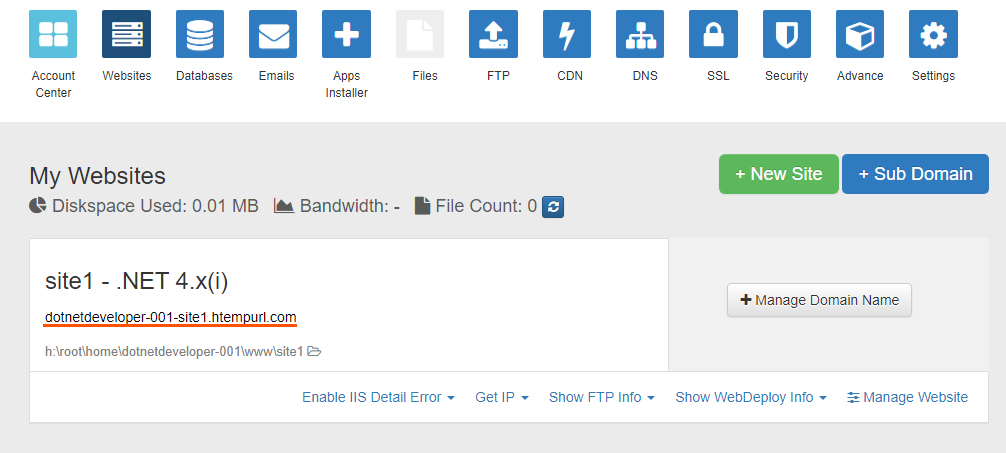
- Now, click Files icon at the top and open site1 folder.
- Inside site1 directory, upload the targeted folder .zip file, unzip it and then you can delete the .zip file.
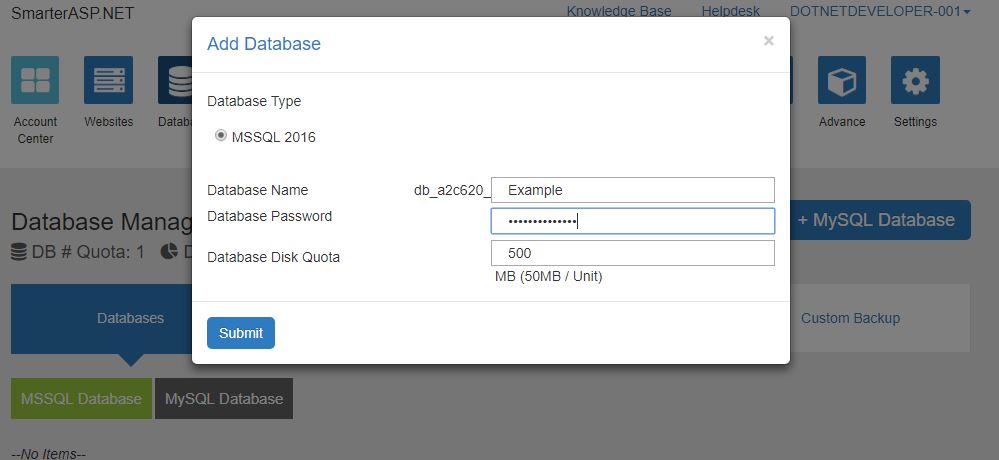
- Click Databases icon at the top. Then, click MSSQL database, fill up name, password and disk quota(space) for database and click Submit.
- Click Actions drop down button and select Attach MDF file to Database. Now, upload the database (.mdf) file.
- After successful database upload, expand Connection String Examples and copy the ASP.NET connection string and replace the connection strings in the web.config.

- Now, your website is ready to access via the domain name from the step 9.